Add Row
Add Element
cropper
update

EDH & Folsom DIY Tips

update
Add Element
  • Home
  • Categories
    • Life Hacks & Local Resource Tips
    • Tips, Tricks and Shortcuts
  • Windows, Screens & Shading Solutions
  • Seasonal Home Maintenance
  • DIY Home Projects
  • Energy Efficiency & Smart Homes
  • Curb Appeal & Exterior Upgrades
  • Local Spotlights & Homeowner Resources
  • Safety & Home Security Tips
  • Pest Prevention & Outdoor Comfort
October 13.2025
2 Minutes Read

Avoid These Winter Garage Storage Mistakes to Protect Your Home

Winter garage storage mistakes: large blue propane tank outside in sunlight.

Why Winter Garage Storage Matters

As winter approaches, the importance of savvy storage in garages cannot be overstated. For homeowners in Folsom and El Dorado Hills, where DIY projects are a beloved pastime, understanding what to store and what to avoid is essential. An uninsulated garage can expose items to conditions that degrade them over time. Think of your garage as an outdoor shed: If something wouldn't withstand freezing temperatures outside, it should not be stored within those four walls.

Top Items to Keep Out of Your Garage This Winter

Home safety experts highlight a range of items that should never be kept in the garage during winter months:

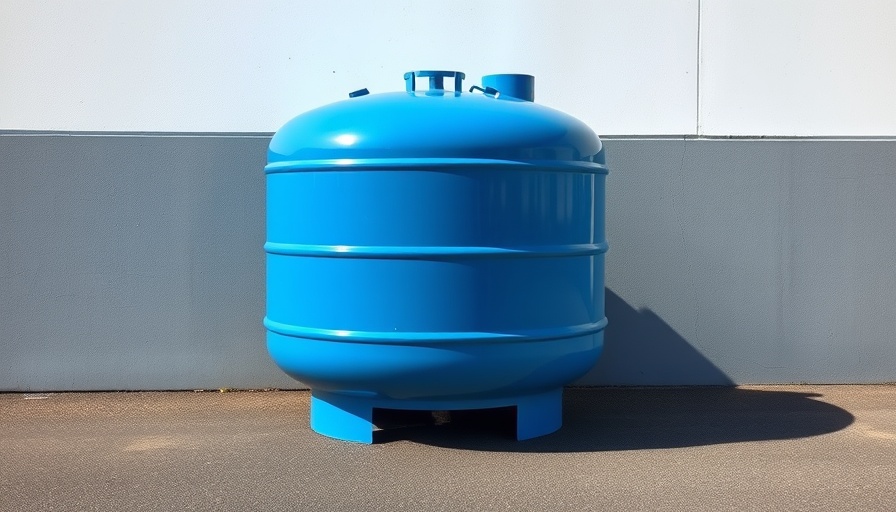
  1. Propane Tanks: Storing propane tanks in a garage can create significant fire risks. House cleaning expert Petya Holevich emphasizes that these tanks should be kept outside, securely upright to prevent leaks.
  2. Gasoline: As noted in the Family Handyman article, fluctuations in temperature can lead to the expansion and contraction of gasoline containers, posing a rupture risk. Fuel should ideally be consumed before storing equipment for the winter.
  3. Paint and Solvents: Cold temperatures can thicken or destabilize paint, making it unusable once spring rolls around. To preserve your finishes, store paint inside your home, in a controlled climate.
  4. Oily Rags: These can spontaneously combust if piled up, making them a dangerous item to forget about in your garage.
  5. Food Supplies: While having emergency food stored is wise, freezing temperatures can ruin canned goods. Consider moving food into the house to maintain quality.

Enhancing Garage Safety This Winter

Incorporating proactive measures is pivotal in winterizing your garage. Insulation, weather stripping, and routine checks on garage doors can combat the cold and keep both belongings and family safe. Simple practices such as draining the water from pressure washers, as suggested by PremierGarage, ensure that plumbing setups do not burst and cause damage during the frost.

Conclusion: Prepare for a Safe Winter

For homeowners who value both DIY home improvement and safety, taking charge of your garage storage is crucial for maintaining the integrity of your belongings and ensuring a safe environment. Always reconsider your garage storage choices as winter rolls in.

As part of your winter preparation, take the time to evaluate your garage storage habits and make necessary adjustments. Understanding the importance of proper winter storage can save you time, resources, and the headache of dealing with damaged items in spring!

Seasonal Home Maintenance

0 Comments

Write A Comment

*
*
Related Posts All Posts

Essential Steps for Winterizing Your Hose Spigot Before Cold Weather Arrives

Update Understanding the Blueprints of Winter Preparation As winter approaches, it’s crucial for homeowners in Folsom and El Dorado Hills, California, to take proactive steps in protecting their property. One pressing task is winterizing outdoor plumbing, particularly hose spigots. These often-overlooked fixtures are prone to freezing and potential damage when temperatures dip. Although California generally enjoys a mild climate, the threat of sudden cold spells isn't uncommon, catching many homeowners off guard. According to master plumber Aaron Adams, it's often when temperatures fall out of the norm that plumbing disasters arise, leading to unexpected expenses. The Importance of Winterizing Your Hose Spigot Letting water sit in your outdoor spigot during freezing conditions can result in catastrophic consequences. As water freezes, it expands, leading to ruptured pipes. When spring arrives and the ice melts, that's when homeowners usually notice the damage—often in the form of leaks or floods. Avoiding these scenarios should be a priority for any homeowner, especially as the cost of repairs can run from $200 to $300, skyrocketing if moisture damage spreads. By winterizing your spigot, you can avert these costly mishaps. Step-By-Step Guide To Winterize Your Hose Spigot The process of winterizing your hose spigot is manageable and can be executed in just a few steps. Start by identifying the shut-off valve inside your home that controls the water supply to the hose spigot. With that in mind, follow these steps: Shut off the valve: Ensure that no water is flowing to the outdoor spigot. Drain the spigot: Turn on the outdoor spigot to release any residual water. Close the spigot: After draining, close the outdoor spigot tightly. Add protective coverings: Optional but recommended, installing styrofoam covers can further shield your spigot from the elements. Take care to remove any hoses attached to the spigot too, as they can also trap water and freeze. Additionally, if you have a frost-proof spigot, while it’s designed to be more resilient, adding a cover for extra protection ensures peace of mind. Costly Consequences of Ignoring Winter Precautions For those considering the long-term effects of neglecting to prepare, a frozen pipe can be an unpleasant surprise, resulting in damage that could total thousands of dollars. Homeowners often wait until they see water leaks to realize the importance of preventative measures. This winter, take charge and ensure your outdoor plumbing is safe from freezing temperatures—it's a smart move for your wallet. Conclusion Winterizing your hose spigot may seem minor, but it holds significant importance in safeguarding your home. By investing just a little time and effort now, you can avoid the headaches and costs associated with plumbing failures down the line. Don’t wait for the cold to arrive to take action; secure your outdoor plumbing and ensure your peace of mind throughout the winter months.

10 Essential Steps for Garden Deck Maintenance This Fall

Update Essential Fall Maintenance for Your Garden Deck As homeowners in Folsom & El Dorado Hills transition from summer to autumn, now is the perfect time to prep your garden deck for the winter months ahead. Maintaining your deck isn’t just about appearance; it’s crucial for ensuring longevity and safety. Here’s a simple 10-step guide that aligns with your DIY spirit while ensuring you call in the pros whenever necessary. 1. Clear the Clutter Start by moving any furniture, potted plants, or decorative items off the deck. This will prevent moisture from being trapped and promote thorough cleaning. Use a soft broom or a leaf blower to remove leaves and debris, ensuring the surface is clear. 2. Dry Sweep, Then Wet Rinse Begin with a gentle sweep to eliminate fine dust and lingering dirt. Follow this up with a light rinse using a hose—remember, you just want to soften grime, not blast it away. 3. Conduct a Quick Health Check Inspect for any lifted boards, protruding screws, or algae buildup, especially on steps. Mark any necessary repairs with painter’s tape for easy recollection later. 4. Select the Right Cleaning Method Different decking materials require different care. For natural softwoods like pine, a mild deck cleaner, a soft brush, and breathable oil afterward are best. Composite materials like Trex or Deckorators call for similarly mild detergents but must avoid harsh chemicals. 5. Spot Clean Grease and Stains Identify any BBQ grease, sunscreen spills, or leaf tannin stains, and address them directly with appropriate spot cleaners before washing the whole deck. 6. The Main Clean Depending on the material, apply cleaner, work it into the deck with gentle agitation, and rinse thoroughly. It’s essential to keep excess runoff contained to avoid harming nearby landscaping. 7. Allow for Proper Drying Time Post-cleaning, give your deck 24-48 hours of dry weather to ensure it’s prepared for any sealing or staining, helping to bond more effectively. 8. Protect the Surface After cleaning, consider applying a protective sealant or oil appropriate for your deck material. This is vital to prevent moisture damage as winter approaches. 9. Seasonal Prep: Furniture and Accessories Remember that outdoor furniture needs your attention too. Clean, store, or cover all pieces to prevent weather-related wear. 10. Plan Ahead for Winter Maintenance Invest in a snow removal strategy to protect your deck from heavy snowfall. Use a broom instead of a shovel to prevent surface damage and avoid corrosive deicers. This fall maintenance routine will not only keep your garden deck looking great but will also guard against the wear and tear that winter can bring. Since you know you may not always have the time or tools required for various tasks, don't hesitate to recruit professional help when needed. A well-maintained deck ensures that when spring arrives, it's not only beautiful but ready for those sunny afternoon BBQs.

Winterize Your Sprinkler System: Essential Tips for Homeowners

Update Protect Your Home: Why Winterizing Your Sprinkler System Matters As winter approaches, homeowners in Folsom and El Dorado Hills face the crucial task of winterizing their sprinkler systems. Neglecting this process can lead to significant damage when freezing temperatures hit. Ice can cause pipes to burst, valves to malfunction, and expensive repairs that you could have avoided with a little preventive maintenance. Fortunately, winterizing your sprinkler system is a straightforward process that anyone can tackle independently. Essential Steps to Winterize Your Sprinkler System The first step to winterizing your system is to shut off the main water supply. Locate the shut-off valve, which is typically found in your basement or utility room. Next, turn off the sprinkler controller in your garage to prevent any accidental activation. One critical component often overlooked is the backflow preventer. This device, usually found on an exterior wall, needs to be drained properly to avoid freezing issues. Open the test cocks, adjust the shutoff valves, and if applicable, remove the drain plug to release any trapped water, a step that landscape professionals stress is vital for safeguarding your system. The most involved part of the process is blowing out the sprinkler lines. Using a high-volume air compressor, connect it to the blow-out port and run each irrigation zone until you only see air emerging. This technique clears out any remaining water, preventing blockages that could create problems in spring. If you feel uncertain about this process, it's advisable to solicit help from a neighbor or a local professional for a thorough walkthrough. When is the Best Time to Winterize? The perfect timing for winterizing your irrigation system depends on your local climate. As a general guideline, it's wise to tackle this chore before the first hard freeze or once temperatures consistently drop into the 30s. Landscape experts recommend completing this task when you no longer need your system to water your plants and lawn. Final Thoughts: Taking Action before Winter Strikes Winterizing your sprinkler system might seem daunting, but with these straightforward steps, you'll protect your investment and simplify your spring maintenance. Not only does this proactive measure save you time and money, but it also gives you peace of mind, knowing your home is ready for the colder months ahead. If you need any further help, consult your local home improvement resources!

Terms of Service

Privacy Policy

Core Modal Title

Sorry, no results found

You Might Find These Articles Interesting

T
Please Check Your Email
We Will Be Following Up Shortly
*
*
*