cropper
update

EDH & Folsom DIY Tips

update
  • Home
  • Categories
    • Life Hacks & Local Resource Tips
    • Tips, Tricks and Shortcuts
  • Windows, Screens & Shading Solutions
  • Seasonal Home Maintenance
  • DIY Home Projects
  • Energy Efficiency & Smart Homes
  • Curb Appeal & Exterior Upgrades
  • Local Spotlights & Homeowner Resources
  • Safety & Home Security Tips
  • Pest Prevention & Outdoor Comfort
July 14.2025
2 Minutes Read

Create a Stylish Firewood Holder: A DIY Project for Folsom and El Dorado Hills Homeowners

DIY firewood holder in a creative hexagonal wall-mounted design.

Crafting the Perfect Firewood Holder: An Essential DIY Project

Homeowners in the picturesque cities of Folsom and El Dorado Hills, California, often find joy not just in living spaces but in outdoor comforts, especially with the cozy glow of a fireplace. If you’re looking for a stylish and functional way to store firewood, crafting your own firewood holder is the perfect DIY project. This isn't just about aesthetics; it's about creating a practical solution that enhances your home's curb appeal while ensuring your firewood is neatly organized and accessible.

Materials You’ll Need

To get started, selecting the right materials is crucial. Look around your workshop or local hardware store for basics like wooden planks, screws, and wood glue. Having at least 3/4" thick wood for the main structure ensures durability, while some plywood can add a solid backing to your holder. Don’t forget a measuring tape and some tools to make your job easier!

Step-by-Step Instructions for Building

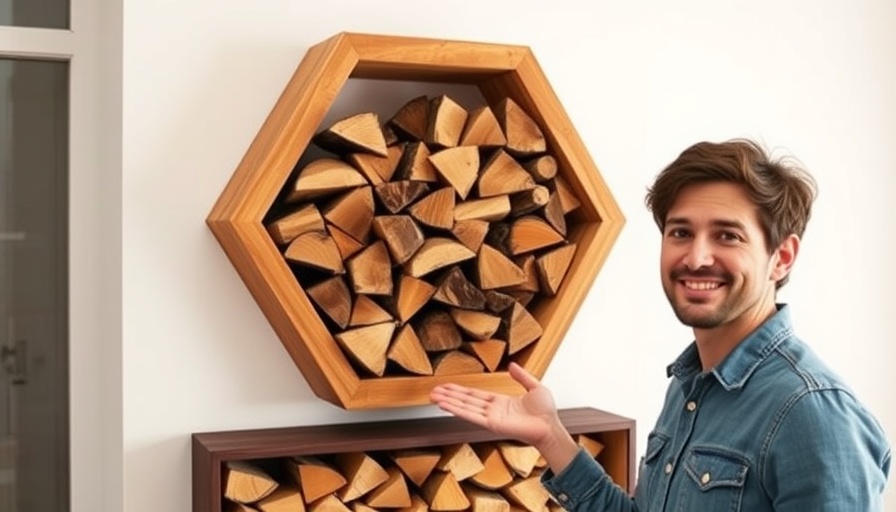
Begin by measuring and cutting your wood to the desired dimensions. Aim to create compartments that categorize your firewood by size; this will not only make storage easy but can also add an attractive element to your yard.

1. Selecting Material: Look for wood you might already have—recycled material can be both practical and eco-friendly.

2. Constructing the Holder: After cutting your planks, assemble them with screws and wood glue. Make sure to regularly check your angles for a perfect fit. A dry fitting before final assembly is always a wise move!

With patience and creativity, your firewood holder will become a sleek addition to your outdoor space.

Why This DIY Project Matters

Building a firewood holder does more than just organize your wood; it also reflects your personal style and enhances your home's outdoor aesthetic. For homeowners who enjoy DIY projects, this is an opportunity to engage in hands-on work that not only beautifies your environment but also provides functional benefits.

Conclusion: Embrace Your DIY Spirit

Take time out this weekend to embark on your firewood holder project! Not only will it keep your firewood conveniently stored, but it will also add a dash of style to your exterior. Home improvement is all about creativity and function coming together; this project is a great way to practice both. So grab your tools, roll up your sleeves, and let’s get building!

DIY Home Projects

Write A Comment

*
*
Please complete the captcha to submit your comment.
Related Posts All Posts

Unlock the True Potential of Your Reciprocating Saw for Every DIY Project

Update Maximizing Your Reciprocating Saw: Beyond Demolition A reciprocating saw, often nicknamed a "Sawzall," is a versatile tool that can transform the way you approach DIY projects. While many homeowners may initially consider it for demolition, its functionality extends well beyond tearing down walls. For residents in Folsom and El Dorado Hills, understanding the true potential of this powerful tool can lead to more efficient home repairs and upgrades. Innovative Uses of Your Reciprocating Saw 1. Pruning Trees and Shrubs: The saw's aggressive blades allow for quick cuts through branches, making it an ideal companion for maintaining your garden. 2. Cutting Pipes: For plumbing repairs, using a reciprocating saw can make short work of old pipes, allowing you to replace plumbing fixtures with ease. 3. Tile Removal: When updating your flooring, this saw can help you efficiently remove old tiles without damaging the substrate underneath. 4. Renovation Projects: Need to modify furniture or walls? The reciprocating saw excels in making quick adjustments. 5. Debris Clearing: After storm damage or seasonal clean-ups, use the saw to cut through fallen branches or debris quickly. By expanding your understanding of the reciprocating saw, you can tackle more than just demolition. It becomes a critical tool in your DIY arsenal, streamlining repairs and enhancing home projects. Tips for Safe Operation As with any power tool, maintaining safety is paramount. Always wear proper protective eyewear and consider gloves to keep your hands safe from sharp edges. Familiarize yourself with the tool’s operation manual, and never rush through a task to prevent accidents. The Long-Term Value of Learning Your Tools Taking the time to understand how to use your reciprocating saw not only empowers you to take on new projects confidently but also saves you money on hiring professionals for simple repairs. Folsom and El Dorado Hills homeowners can leverage this knowledge to improve their homes while enjoying the satisfaction of completing projects on their own. So, the next time you think about putting your Sawzall to work, remember that it's not just for demolition—embrace its versatile nature to become a more effective DIYer.

Unlock Crystal-Clear Water with the Beatbot AquaSense 2 Pro Today!

Update Discover the Beatbot AquaSense 2 Pro: A Game-Changer for Pool Owners As a homeowner in Folsom or El Dorado Hills, you'll understand the challenge of keeping your pool sparkling clean, especially in California’s hot summer months when dust and debris seem to find their way right into the water. Enter the Beatbot AquaSense 2 Pro, a revolutionary robotic pool cleaner that promises to transform the way you maintain your backyard oasis. What Makes the AquaSense 2 Pro Stand Out? The Beatbot AquaSense 2 Pro is designed for pools up to 3,875 square feet, making it suitable for a wide range of pool sizes and shapes. One of its standout features is the CleverNav Smart Navigation System, which uses advanced ultrasonic mapping to navigate your pool, ensuring complete coverage without missing a spot. This not only saves time but also provides a thorough clean that traditional cleaning methods can hardly match. Performance: Efficiency and Convenience The AquaSense boasts a long runtime of up to 10 hours for surface cleaning and 5 hours for more intensive floor, wall, and waterline cleaning. Its automatic surface parking feature allows the device to return to the surface of your pool after completing its cleaning cycle, making it incredibly easy to retrieve. Plus, with an accompanying app, you can control the cleaner from your smartphone, adding a layer of convenience that busy homeowners will appreciate. Eco-friendly Features In addition to its cleaning capabilities, the Beatbot AquaSense 2 Pro incorporates ClearWater Natural Clarification, which utilizes skin-safe and eco-friendly agents to promote cleanliness. This feature not only helps clear your water but does so without harsh chemicals, making it a healthier option for your family and guests. Cost-Efficiency Compared to Traditional Cleaning Methods Investing in the AquaSense 2 Pro may prove to be more cost-effective over time than hiring a pool service. With its smart cleaning technology and convenience, it allows for frequency of cleaning at a fraction of the cost of traditional methods, saving you both time and money. The Beatbot AquaSense 2 Pro not only simplifies pool maintenance but also enhances your leisure time by reducing the hassle of routine cleaning. Embrace smart home technology today, making your pool care easier than ever. If you’re seeking ways to make the most of your DIY fixes and outdoor comfort, the AquaSense 2 Pro is an essential addition to your home. Why spend hours scrubbing when this innovative robot can do the work for you?

Selecting the Right Shovel for Your DIY Projects: A Homeowner's Guide

Update Understanding the Versatility of ShovelsFor homeowners in cities like Folsom and El Dorado Hills, having the right tools can make all the difference in your DIY projects. Shovels are particularly versatile, designed for a range of tasks from digging to edging to spreading. But with so many types of shovels available, knowing which one to use for each job is essential.Common Types of ShovelsFirst, let's break down the most common types of shovels you’re likely to encounter:Garden Shovel: Ideal for planting, this shovel features a pointed tip for easy breaking into soil.Square-Point Shovel: Best for lifting and moving materials, like gravel or soil, thanks to its flat blade.Round-Point Shovel: Great for digging, as it can penetrate tough ground more efficiently.Edging Shovel: Specifically designed for creating clean lines in gardens and landscaping.Making the Most of Your ShovelsWhen you choose the right shovel for the task, you’ll not only save time but also increase the efficiency of your work. For example, using a round-point shovel on rocky terrain might prove frustrating when a square-point shovel will suffice. Plus, understanding the differences can streamline your efforts whether you're tackling a garden redesign or simply digging a hole for a fence post.Practical Tips for HomeownersAs a DIY enthusiast, knowing which shovel to grab can turn a frustrating day into a productive one. If you're hiring help for major repairs, be sure to discuss your preferred tools with your contractors. This ensures that everyone is on the same page about how to approach the job, allowing for smoother communication and fewer misunderstandings. Invest in a quality shovel as part of your toolkit, and you'll find many tasks around your home become much easier—a worthwhile endeavor for any homeowner.

Terms of Service

Privacy Policy

Core Modal Title

Sorry, no results found

You Might Find These Articles Interesting

T
Please Check Your Email
We Will Be Following Up Shortly
*
*
*